|
A Small Diningroom
This
diningroom is still in progress. Check back for updates to see the
final room when it's done.
Scroll down to see updated pictures!

Cost:
$42.00 for 3 cans of paint
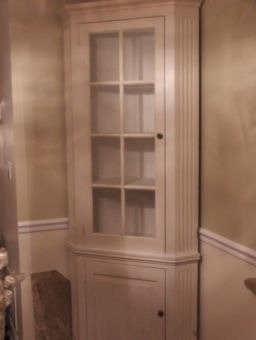
$75.00 for a built in china
cabinet
$60.00 for wainscot
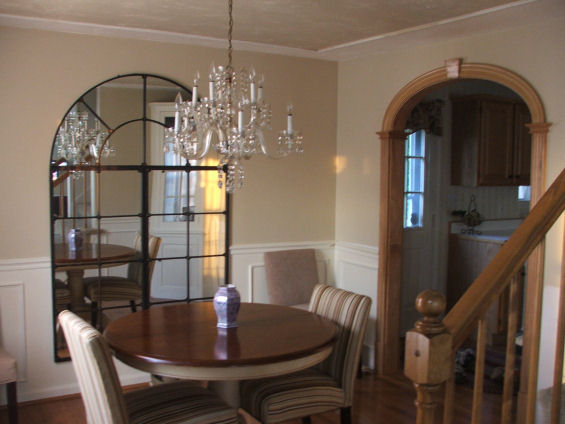
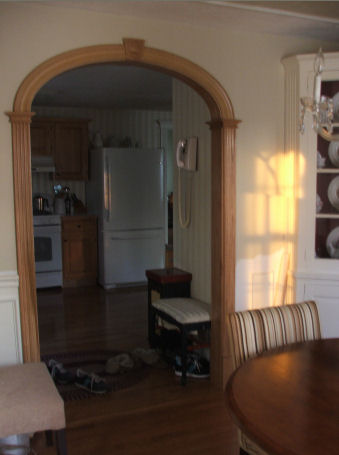
$480.00 for custom wooden Arch
$300.00 for Palladian Mirror
$600.00 for installation of
drywall and arch
Supplies:
Paint (Sherwin-Williams
Harmony; 1 gallon Dover White, 1 gallon Softer Tan and 1 quart Fiery Brown
all
in eg-shel finish)
Picture Molding
Finishing Nails
Wood fill (for nail holes)
Paintable Calking (to
fill in the gaps between the chair rail and wall)
Lumber & Sheetrock
Arch kit
Screws
Molding
Tools:
Paint tray, brushes and rollers
(drop cloths if your messy)
Power Drill (to drill holes in
the picture molding)
Hammer
Table saw (to cut the chair
rail and baseboards so the china cabinet will fit flush with the walls)
Miter Saw (to cut the
molding for the wainscot)
Action plan:
Paint the upper walls
Sherwin-Williams Harmony paint, color is Softer Tan.
Paint the lower walls and chair
rail Dover white
Sand and paint the corner china
cabinet (outside in Dover white inside in Sherwin-Williams Harmony Fiery
Brown)
Cut the molding and create
frames for the look of wainscot and frame for the ceiling. Paint
inside the box on the
ceiling the same color as the
upper walls.
Still To Do:
Install a header
Install Arch kit
Install Window Casing
Install Crown Molding
Inspiration:
My inspiration for this room
didn't come from any pictures or homes I had seen. Lack of space
in that room
was a factor for me.
Knowing I didn't have the room for a full size china cabinet I knew I
needed a corner
unit. I prefer antiques
as opposed to most new or modern pieces of furniture so with that I
searched ebay
and the craigslist until I
found one that I was happy with. I didn't want a cabinet to just
put there I want the
look of a real built in.
I figured if I couldn't find one I would build one, it was going to cost
me around 200.00
to build one, so when I found
this one for 75.00 on the craigslist I snatched it up. I carried
the Softer Tan
color into the diningroom from
the livingroom, as there are no walls to break the two rooms apart (only
the
front door is between them).
I decided to leave the chair rail the previous owners put up, but I
didn't like it in
the natural wood (it looked too
country to me) so I decided to paint it white, then I decided I wanted
the room
to look more formal. Easy
solution is to use wainscot. My previous house had all wood
wainscot, but wanting
to keep my budget low I decided
to take the cheaper road and just put up picture molding to mimic real
wainscot.
To continue the more formal
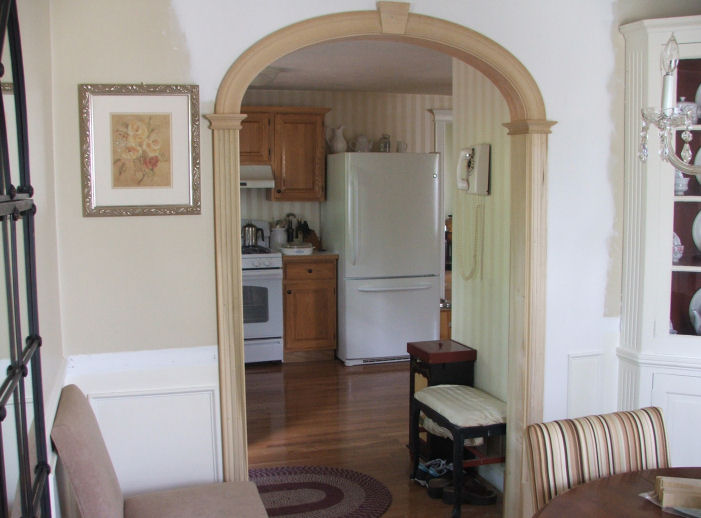
look I want to achieve I will put a header in the doorway from the
diningroom to the
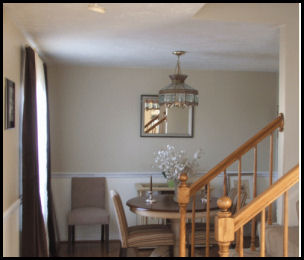
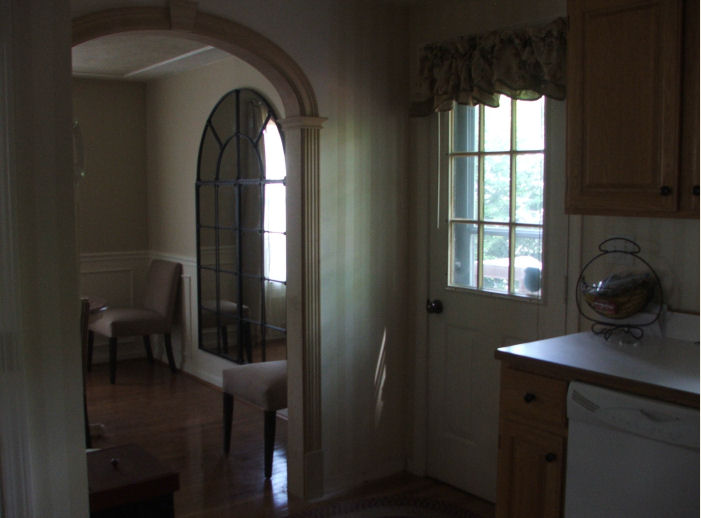
kitchen (currently the doorway
is opened to the ceiling, you can see this in the first picture of the
diningroom) and
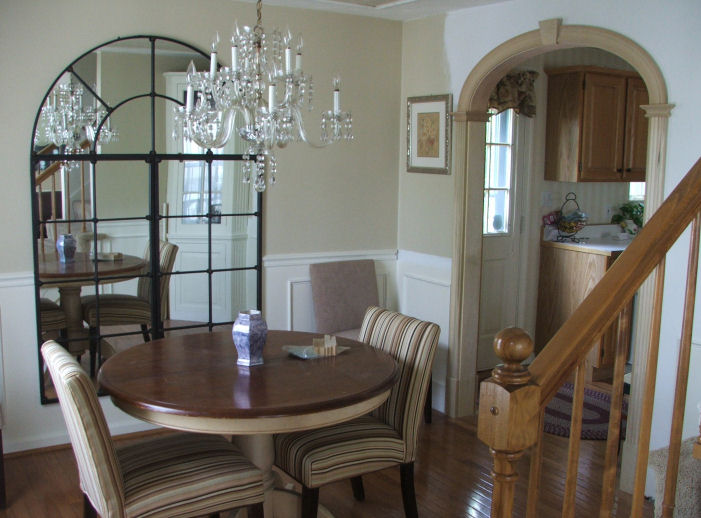
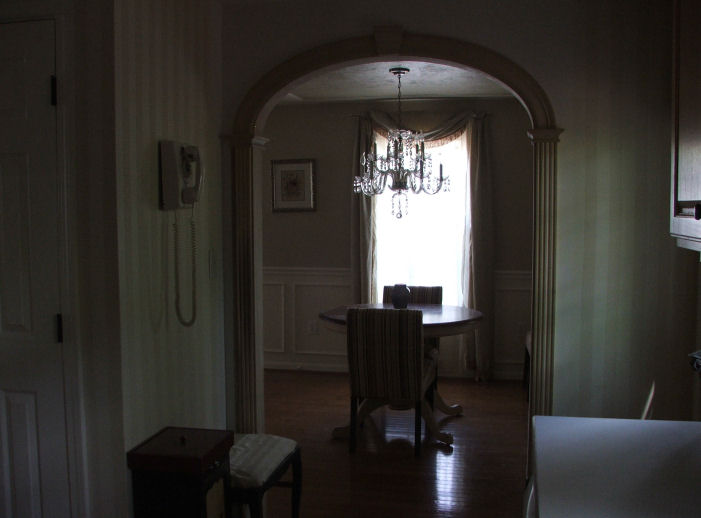
install the Arch Kit I
purchased. I wanted the space to feel larger so I purchased a 3
piece Palladian style mirror.
Process:
I started out by painting the top
half of the walls then the chair rail. I removed the chair rail and baseboards in the
corner for the china cabinet to fit
flush.
Cut the chair rail and baseboards to
fit snugly up against the china cabinet, attach those, chalk, fill the
nail holes
then touch up the paint. Cut
the picture molding to make frames and attached those to the lower half of
the walls.
Paint the lower walls in Dover white.
Installed my parents chandelier.
Install some 2 x 4's to make a
frame for a header between the kitchen and diningroom doorway,
cover that in sheetrock,
tape it then sand and paint it.
Install the Arch Kit.
I used one of my graphics software to
determine the amount of squares I wanted per wall I did that by using a
photo of my
dining room and drew on the wainscot from
there I cut the molding and created the frames to make it look like
wainscot
nailed them onto the wall and filled the
nail holes I still have to paint the lower half of the walls.
I painted the wainscot originally
bright white, after giving it a day or two I decided I didn't like it
bright white I wanted it to
look more elegant so I repainted it
in Sherwin Williams Dover White. This white paint made a huge
difference.
Sometimes bright white paint isn't always
the nicest choice! See the updated photos
below of the "box" on the ceiling
I recently added in August 2008 and the new
arch installed May of 2009
|